Nixie Tube Clock

|
|
Nixie Tube Clock |
|
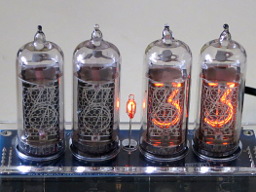
Is there any retro-technologist who doesn't love nixie tubes? Originally developed in the 1950s, a nixie tube consists of an envelope filled with a rarefied gas (usually neon, sometimes with a bit of argon), a wire mesh anode, and ten separate cathodes in the shapes of the decimal digits (or whatever the designer wishes). A constant positive voltage is applied to the anode, and the cathodes can be made to light up by connecting them to ground, which causes a current to flow, making the gas near the grounded cathode glow in the shape of the digit. Nixie tubes are particularly easy to drive from decimal-oriented circuits such as ring counters, and were widely used in early computers, calculators, and test equipment. A rapidly-changing nixie tube has a particularly intriguing appearance since each digit appears in its own plane and the digits consequently appear to jump toward and away from the viewer.
By the 1970s, nixie tubes had largely been replaced in the west by LED and vacuum fluorescent displays, but they remained in use in the Soviet bloc for many more years, and new old stock (NOS) tubes from Soviet and Eastern European manufacturers are readily available today at affordable prices. Nixie tubes are cold cathode devices and have no filament to burn out, so they have long lifetimes: a well-made nixie tube can last more than twenty years in continuous operation.
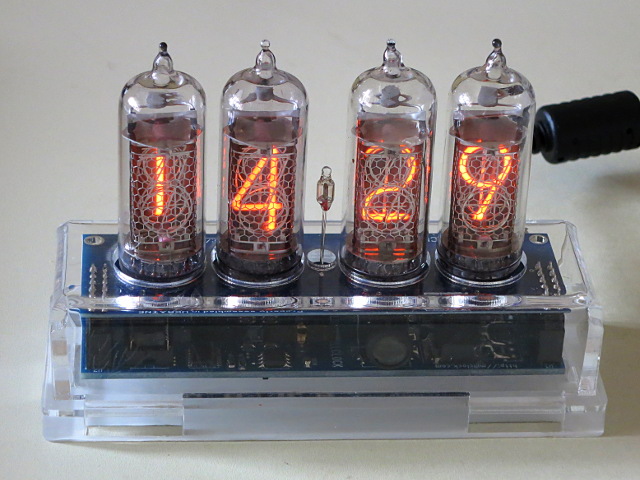
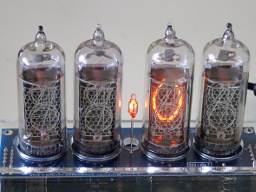
I have had an inordinate fondness for nixie tubes ever since I first glimpsed one in the 1960s, and when I heard of a source for a nixie tube clock, jumped on the opportunity to obtain one. The clock pictured above, running next to the computer on which I'm writing this document, is made by Millclock of Zaporizhzhska, Ukraine. They sell a variety of nixie-based clocks and thermometers: this is one of their less fancy offerings. This model is available both in kit and assembled form. I opted for the assembled version since it uses surface mount components and, although I've been building electronic gear since I was nine years old, I lack the equipment and experience for that demanding technology.
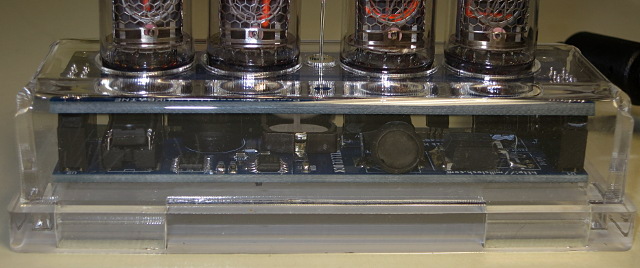
Inside the clock are two circuit boards. The top circuit board mounts the nixie tubes and blue LEDs for the optional back light. The nixie tubes are soldered directly to the top board: they are not socketed. The rest of the circuitry is on the bottom board. A button battery provides back-up power so the clock need not be reset in the event of a power outage (the nixie tube display is, of course, extinguished while external power is absent).
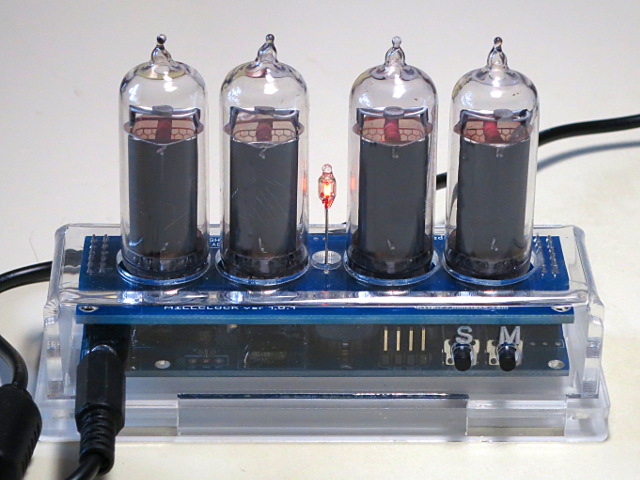
Here is a view of the back of the clock. It is powered by a “wall wart” power adapter which delivers 12 volts DC through the power connector at the left (barrel negative, pin positive). The wall wart has a Europlug mains plug; if your wiring uses a different standard you'll need an adapter; it runs on either 50 or 60 Hz and any voltage from 100 to 240 V, so that's all you'll need. The two intermittent switches at right are used to set the clock and specify modes. If the “S” switch is pressed while the clock is running, it will switch from displaying the time to showing the date, then switch back automatically to the time. Pressing the “M” switch toggles among mode settings as described below.
 The first press on the “M” button allows you to set the
hour. Each press on the “S” button increments the hour, or
you can hold down the button to rapidly advance the hour. The hour is
always set in 24 hour mode, from 0 to 23, even if you've selected 12
hour display (see below). If you don't want to set something, just
press the “M” button to advance to the next setting without
pressing the “S” button.
The first press on the “M” button allows you to set the
hour. Each press on the “S” button increments the hour, or
you can hold down the button to rapidly advance the hour. The hour is
always set in 24 hour mode, from 0 to 23, even if you've selected 12
hour display (see below). If you don't want to set something, just
press the “M” button to advance to the next setting without
pressing the “S” button.
 The next press on “M” advances to set the minute, which is
set just like the hour. When you change the hour or minute, the
seconds are automatically reset to zero. You can use this, while
watching another clock, to set the clock to the second. If you skip
past the hour and second without changing them, the seconds will not be
reset and the clock will continue to run while you modify other
settings.
The next press on “M” advances to set the minute, which is
set just like the hour. When you change the hour or minute, the
seconds are automatically reset to zero. You can use this, while
watching another clock, to set the clock to the second. If you skip
past the hour and second without changing them, the seconds will not be
reset and the clock will continue to run while you modify other
settings.
 The day of the month is set next, using the same procedure.
 The month, from 1 for January to 12 for December is set next.
 Next, you set the year,
modulo 100 (for example, 18 for 2018).
Next, you set the year,
modulo 100 (for example, 18 for 2018).
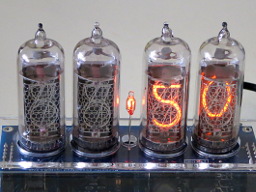 The next setting is used to “trim” the rate at which the
clock runs to correct it if it gains or loses time. The default
setting of 50 (note that in the Soviet bloc IN-14 tubes used in this
clock, the “5” is an upside-down “2”) is the
default rate of the clock's oscillator. You can adjust it up and down
between 0 and 99 to correct the oscillator's speed. My clock runs just
fine with the default setting.
The next setting is used to “trim” the rate at which the
clock runs to correct it if it gains or loses time. The default
setting of 50 (note that in the Soviet bloc IN-14 tubes used in this
clock, the “5” is an upside-down “2”) is the
default rate of the clock's oscillator. You can adjust it up and down
between 0 and 99 to correct the oscillator's speed. My clock runs just
fine with the default setting.
 Next, we encounter a sequence of mode settings which are specified by
single digits. The first setting controls whether the clock displays
the time continuously until the “S” button is pressed to
show the date (0), or cycles back and forth from time to date (1). Use
the “S” button to choose the desired mode.
Next, we encounter a sequence of mode settings which are specified by
single digits. The first setting controls whether the clock displays
the time continuously until the “S” button is pressed to
show the date (0), or cycles back and forth from time to date (1). Use
the “S” button to choose the desired mode.
 You can choose to show the time in 24 hour mode (0) or 12 hour mode
(1). Note that if you set 12 hour mode, you must still enter hours in
24 hour mode when setting the clock time or alarm.
You can choose to show the time in 24 hour mode (0) or 12 hour mode
(1). Note that if you set 12 hour mode, you must still enter hours in
24 hour mode when setting the clock time or alarm.
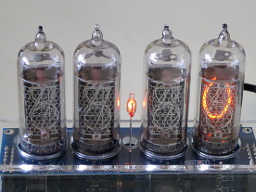
 The clock includes blue LEDs beneath each of the nixie tubes to provide
a backlight effect. You can choose among four modes. If you choose 0,
the backlight is always off; if 1, always on. Mode 2 turns the
backlight on between 6 and 23 hours, while in mode 3, it is on from 22
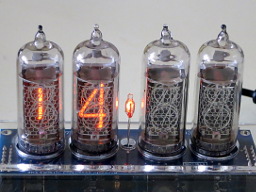
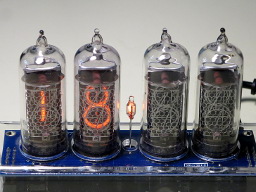
to 6 hours. Here is the clock with the backlight activated.
The clock includes blue LEDs beneath each of the nixie tubes to provide
a backlight effect. You can choose among four modes. If you choose 0,
the backlight is always off; if 1, always on. Mode 2 turns the
backlight on between 6 and 23 hours, while in mode 3, it is on from 22
to 6 hours. Here is the clock with the backlight activated.
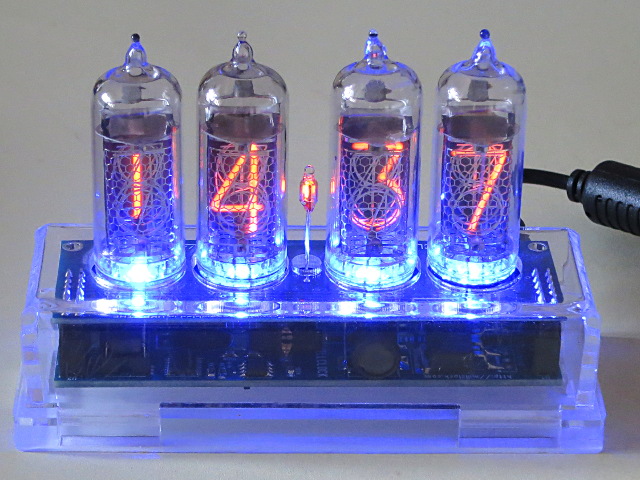
I have remarked that the blue LED is the technological design cliché of the present day, and further I find that it detracts from the mellow retro vibe of the orange nixie glow. Other than for this picture, I'll leave it off.
 In the clock application, the most significant digits of the hour and
minute displays use a subset of the ten digits in the tube. This
renders them vulnerable to reduced lifetime due to “cathode
poisoning”. Setting this mode to 1 causes the clock to
periodically cycle among all digits to reduce the impact of this and
extend the tubes' lives.
In the clock application, the most significant digits of the hour and
minute displays use a subset of the ten digits in the tube. This
renders them vulnerable to reduced lifetime due to “cathode
poisoning”. Setting this mode to 1 causes the clock to
periodically cycle among all digits to reduce the impact of this and
extend the tubes' lives.
 This activates (1) or deactivates (0) the alarm clock function.
 If you'd like the clock to beep at the top of the hour (why?)
set this to 1, otherwise leave it 0.
If you'd like the clock to beep at the top of the hour (why?)
set this to 1, otherwise leave it 0.
 Set to 1 to set the hours of the alarm.
 Set to 1 to set the minutes of the alarm.
 Set the alarm hour (24 hour clock).
 Set the alarm minute (0–59).
After you have set all the modes, the clock will cycle through all the digits to confirm the settings and return to the time display.
To be sure, this clock does not use remote radio, NTP, or GPS to set itself automatically. You'll have to reset it if it drifts, and twice a year if you live in one of those benighted jurisdictions where a coercive government makes its subjects change their clocks twice a year. (Look at us! We have so much power over you we can change the time!) But this is retro-technology—none of those things (well, maybe the coercive government) existed in the heyday of nixie tubes. What I like about this clock is not just the look, but that, sitting on the nightstand, it serves as a night vision friendly night light and its big digits are (more or less) legible to my myopic eyes without fumbling for glasses.
One ergonomics note: between the hours and minutes tubes, there's a small neon lamp which blinks every second. The leads to this lamp are uninsulated, and protected only by the adjacent tubes. If these leads should be shorted together, they'll short the high voltage supply, which may take down the display. If you somehow manage to touch them with your finger (which is very difficult), you'll get a (harmless) shock. Be careful not to disturb this bulb.
|
by John Walker February, 2018 |
|